Restorative Mushrooms
Organic Cultivation Bundle - Grain Spawn (5 lb) & Substrate Grow Bags (10 lb)
Organic Cultivation Bundle - Grain Spawn (5 lb) & Substrate Grow Bags (10 lb)
40 in stock
Couldn't load pickup availability
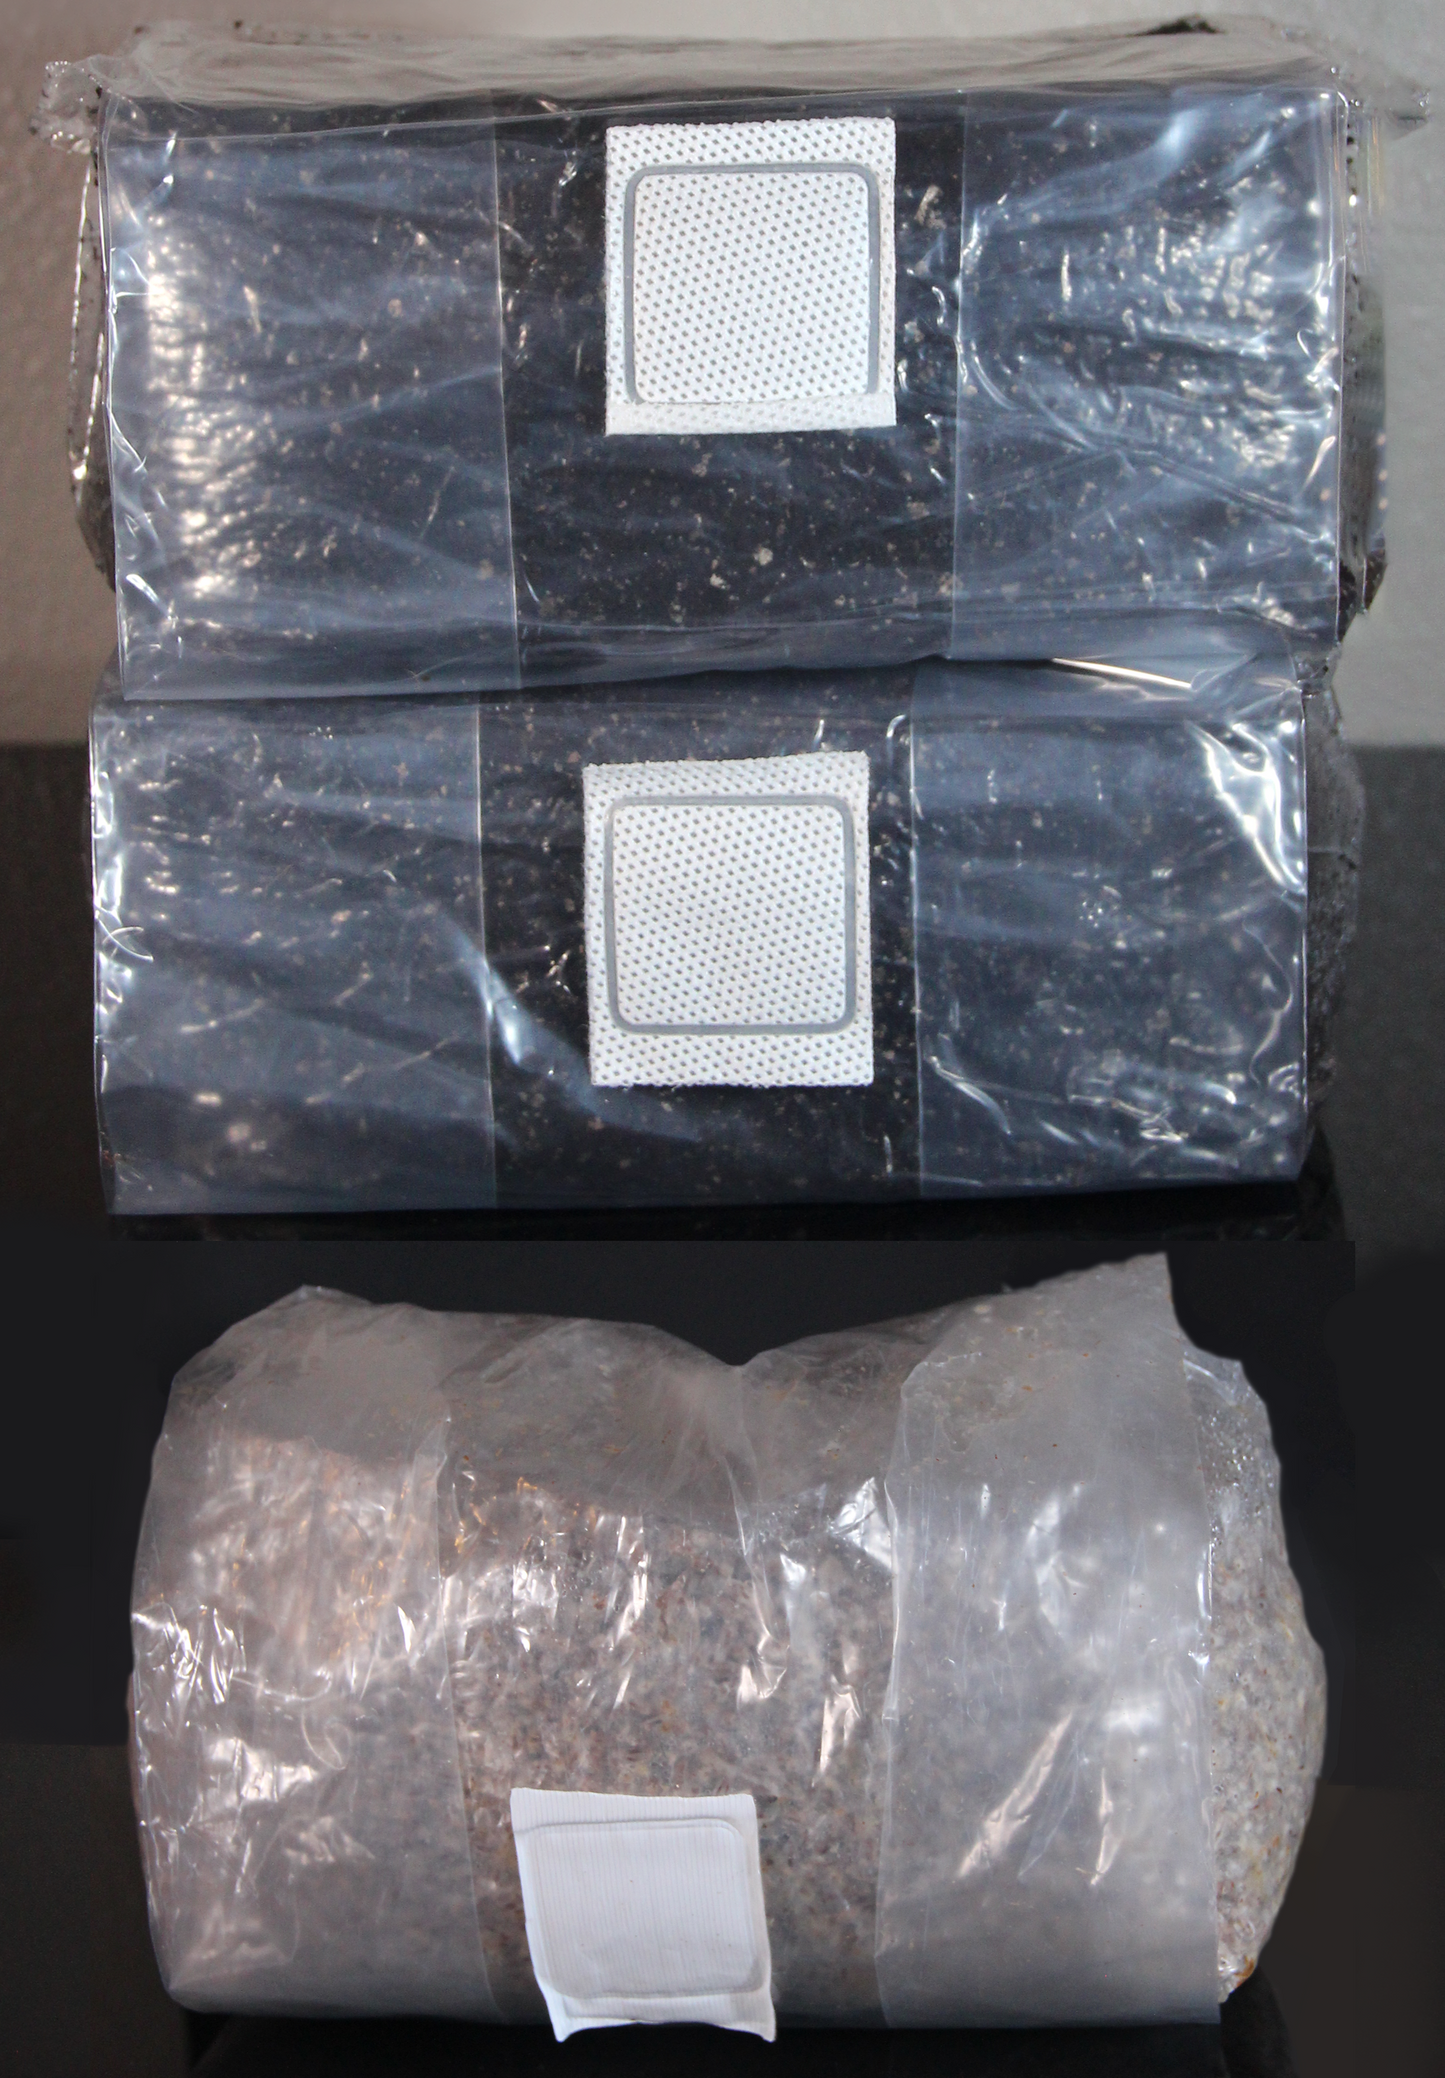
We made it super simple to set up your at-home mushroom grow! You'll save 15% with this bundle, which includes two 5 lb organic substrate grow bags and one 5 lb organic sterilized grain spawn bags ready for you to inoculate with a spore syringe or liquid culture (not included).
Our substrate grow bags are comprised of coco coir, vermiculite and gypsum used to cultivate various gourmet and functional mushrooms. We pasteurize our substrate media because sterilization creates a blank canvas that can easily introduce opportunistic contamination. Pasteurization sets your grow up for success!
How to inoculate your Grain Bags
How to inoculate your Grain Bags
1. When you receive your bag, inspect it immediately for contamination.
**BEST PRACTICE: We recommend waiting a minimum of 1 week after receiving your Grain Bags before injecting to ensure they were not compromised during shipment. Restorative Mushrooms provides a 100% guarantees for your purchase, if your bag was contaminated shipment we will replace it. Once you inject your bag with spores it is non-refundable.
2. We recommended 2-3 lb of colonized grain spawn for every 5 lbs of Pasteurized Substrate. To inoculate the grain bag, inject your spore or culture syringe through the port in a sterile location with clean hands and sterile gloves.
**BEST PRACTICE: In order to keep your work area as sterile as possible, spray gloves with alcohol and allow to air dry completely before injecting your Sterilized Grain Bag. If you touch any contaminated surface while wearing gloves (phone, door knob, etc.) use a new pair of gloves and decontaminate as outlined above.
3. Allow your bag to colonize out of direct sunlight and at room temperature, do not allow incubation environment to exceed 75 degrees F (24 C) or fall below 55 degrees F (13 C). After two weeks you should begin to see white mycelium growing on the grain, beginning from the injection port.
4. After the mycelium has grown about 3 inches from the injection port you can carefully break up the colonized grain in order to mix it into the uncolonized grain. This step will significantly increase the colonization speed. Make sure you do not open the bag while breaking up the colonized grain.
5. When the colonized grain has turned completely white with mycelium your spawn bag is ready to use. Depending on the species you are growing and the age, health and strength of your culture this entire process can take anywhere from a couple weeks to over a month.
How to cultivate mushrooms from your Substrate Bags
How to cultivate mushrooms from your Substrate Bags
1. Before opening the Pasteurized Substrate bag, ensure that your fruiting chamber (or mono-tub) and work environment are decontaminated thoroughly clean with isopropyl alcohol and allow to fully dry.
*BEST PRACTICE: In order to keep your work area as sterile as possible, spray gloves with alcohol and allow to air dry completely before opening your Pasteurized Substrate Bag. If you touch any contaminated surface while wearing gloves (phone, door knob, etc.) use a new pair of gloves and decontaminate as outlined above.
2.Before opening the Pasteurized Substrate bag break up the contents of the bag, so it becomes aerated and recompacted. Now you are ready to open the bag and empty the contents into your sterilized container.
*BEST PRACTICE:Mushrooms need oxygen to grow and they will suffocate and die if there is not enough airflow available. Ensure your bin has proper airflow so your mushrooms thrive. Common low tech method for bins is to use Poly-fil, which you can find at most big box or craft stores.
3. While wearing gloves, pick up a handful of the substrate and squeeze it. As you squeeze you should see a few drops of water come out. If there are no water droplets, thoroughly mix in sterilized water a tablespoon at a time until you reach the proper hydration level as outlined above.
*BEST PRACTICE: Sterilized water that is free of bacterial and/or microbial life. This is typically done using an autoclave or a pressure cooker. Additionally, you may choose to use 2-3 Tbsp. of hydrogen peroxide per gallon of water to sterilize it.
4. You should use 2.5 lbs. of inoculated Grain Pawnper 5 lb. bag of the substrate. Mix your grain spawn thoroughly into the substrate in your tub. Still wearing latex gloves, cover your bin with its lid, but ensure there are filtered holes in it for air exchange.
5. Incubation for most species generally takes about 2-3 weeks depending on your environment. Check on your bin regularly, healthy bins it will start to turn white from mycelium growth.
6. When the bin is fully colonized, you will begin to see mushroom hyphae forming pins on the substrate surface. From here you can either let the mushrooms continue to grow without any intervention, or add a thin layer of coco coir to the top as a casing layer to aid in moisture retention.
*BEST PRACTICE: Keep your grow environment humid and decontaminated, ensure adequate air flow, and soon you'll be celebrating the growth of your very own mushrooms right at home!
Our Certifications
Our Certifications
Premium Ingredients
Premium Ingredients
Coco coir has many benefits to the mushroom cultivation process including moisture retention, gas exchange, and high resistance to contaminants. It is made from coconut husks, is biodegradable, and is a 100% renewable resource. It also has trace minerals including Magnesium, Calcium and Nitrogen that facilitate mushrooms growth
Our organic sterilized grain spawn bags contain sterilized organic rye berries and include a self-healing injection port for use with a spore or culture syringe. Also includes a 0.2 micron filter patch to prevent contamination while allowing gas exchange.
Share


